You just unboxed your LCF Game Stick.
And now you’re staring at it, wondering what the hell to do next.
The manual? Thin. Confusing.
Useless if you’ve never plugged in a retro console before.
How to Configure Lcfgamestick shouldn’t mean Googling error codes at 2 a.m.
I’ve set up dozens of these things. Seen every dead-end: wrong HDMI port, missing power adapter, controller sync fails.
You’ll get stuck on the same three things. I’ll tell you which ones. And how to skip them.
This isn’t theory. This is what works. Every time.
Ten minutes from now, you’ll be playing Super Mario Bros. Not reading instructions.
No fluff. No jargon. Just the exact steps.
Nothing more, nothing less.
Unbox First. Count Everything.
I open the box and dump it out on the table. No drama. No fanfare.
Just parts.
Here’s what should be inside:
- The Game Stick (that HDMI dongle you plug into your TV)
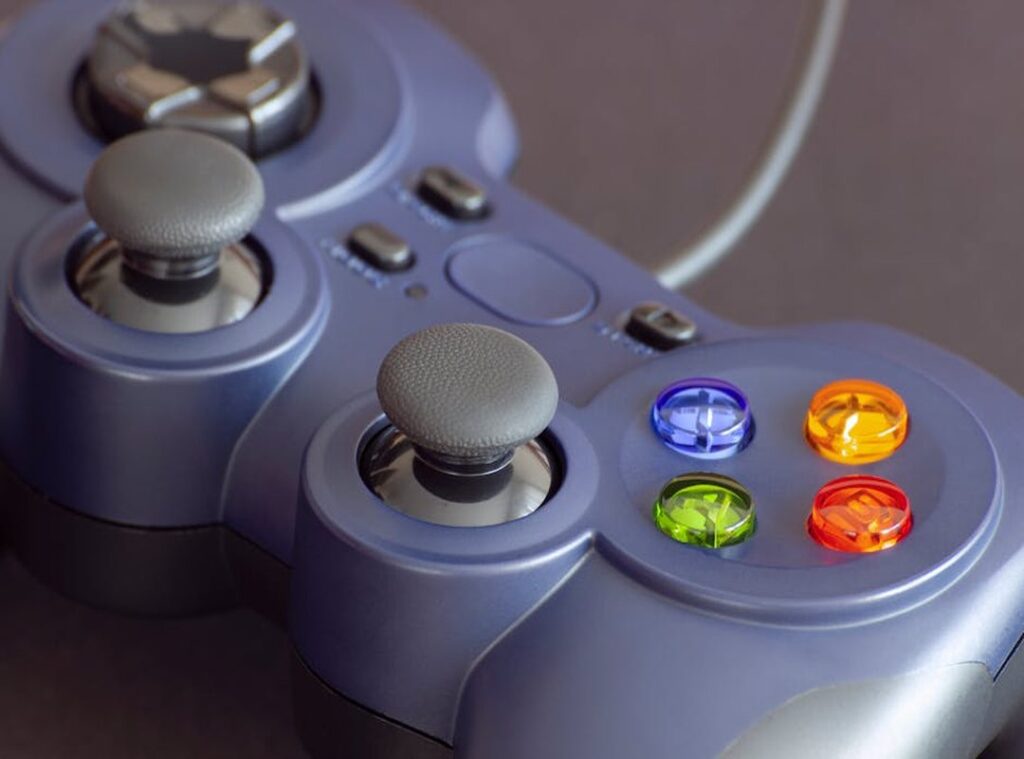
- Two wireless controllers
- One USB receiver (it plugs into your TV or console to talk to the controllers)
- One HDMI extender cable (thin, flexible, helps when your TV has zero room behind it)
- One USB power cable (for the Game Stick (it) needs juice, not just video)
That HDMI extender? It’s not optional fluff. I’ve shoved mine into a cabinet with 1.2 inches of clearance.
Without it, the stick wouldn’t fit. Period.
Batteries for the controllers? Not included. AAA only.
Check your junk drawer before you panic. (Yes, I forgot once. Yes, it sucked.)
You’ll need all of this before you even think about How to Configure Lcfgamestick.
The Lcfgamestick page walks through setup (but) only if you’ve got every piece in front of you.
Missing one thing breaks the whole chain. So count twice. Plug in once.
Hook It Up: Your TV and the Game Stick
I plug in a lot of things. This one’s simpler than it looks.
Step 1: Take the tiny USB receiver for the controllers. Plug it into one of the USB ports on the Game Stick itself. Not your TV.
Not your laptop. The stick. (Yes, it’s small.
Yes, it fits.)
Step 2: Grab the HDMI cable. Plug one end into the Game Stick. Plug the other into your TV’s HDMI port.
Use the included extender cable if your TV’s port is tight or recessed. That little black sleeve saves your HDMI port from bending. I’ve seen bent ports.
They’re sad.
Step 3: Now the power. One end of the USB cable goes into the Game Stick’s micro-USB port. The other end?
Plug it into a USB port on your TV (if) your TV supplies at least 1A. If not, use the wall adapter. Don’t risk it.
A weak power supply makes the stick stutter. Or die mid-game. (Not fun.)
Step 4: Pop batteries into both controllers. Flip the switch on the back. You’ll see a light blink.
Good. They’re awake.
Step 5: Grab your TV remote. Hit “Input” or “Source.” Scroll until you land on the HDMI port you used. It might say “HDMI 1” or “HDMI ARC”.
Just match the port number.
That’s it. No firmware updates yet. No app downloads.
No pairing dance.
You’re ready to go.
How to Configure Lcfgamestick starts here (with) this physical setup. Get this wrong, and nothing else matters.
I once watched someone try to run the stick off a USB hub. It powered on. Then froze at the logo screen.
Took twenty minutes to figure out the hub couldn’t handle the load.
Pro tip: Label your HDMI cables with tape. Saves time when you add a soundbar or console later.
Your TV doesn’t care about your gaming dreams. It only cares about clean power and the right input.
Turn it on. Watch the boot screen. Smile.
You just beat the hardest part.
Powering On: Main Menu, Games, and Getting Lost (Then Found)

The screen lights up. You see a grid. Or a list.
Maybe icons. It depends on your theme. But it’s clean.
No ads. No sign-in. Just games.
I hate menus that make me hunt for the start button. This one doesn’t do that.
Use the D-pad to scroll. Up. Down.
Left. Right. It works like a remote (not) a flight simulator.
Press A to select. Or Start. Either one opens the game.
Try both. See which feels right.
You think it’s all one pile of games? Nope. There are tabs.
NES. SNES. Genesis.
Game Boy. They’re not hidden (just) tucked behind a little icon in the top corner. Tap it.
Switch emulators like changing channels.
Does it feel slow? It shouldn’t. If it does, you probably skipped the How to set up lcfgamestick step where you load the right BIOS files.
Want out of a game? Hold Select + Start. Not one.
Both. At the same time. Let go.
You’re back at the menu.
No confirmation screen. No “are you sure?” Just gone. I like that.
Search works. Type a few letters. It finds matches instantly.
Useful when you remember Super Mario Bros. but not whether it’s under NES or “Favorites.”
History shows what you played last. Not just yesterday (last) hour. Last five minutes.
Handy if you bailed mid-game and forgot the name.
Favorites? Press A on any game. Then pick “Add to Favorites.” Done.
No login. No cloud sync. It lives on the stick.
Some people add ten games. I add three. The ones I actually play.
Why configure anything else? You don’t need to. Not yet.
How to Configure Lcfgamestick is only relevant if this menu feels broken. Or missing games. Or won’t save your picks.
It usually isn’t.
Just press A. Play. Stop.
Repeat.
Setup Problems That Waste Your Time
No signal on TV? I’ve stared at that black screen too. Check the HDMI cable first.
Not the one you think is plugged in. Unplug it and plug it back in. Make sure the TV is set to the right input (HDMI 1, not HDMI 2).
And yes. That tiny USB power cable needs to be fully seated. Not half-in.
Fully in.
Controllers not working? Swap the batteries. Even if they look fine.
Then yank the USB receiver out and jam it back into the stick. If that fails, re-pair them. It takes 12 seconds.
Don’t skip it.
Screen flickering or going black? Your TV’s USB port is lying to you. It says “power” but delivers maybe 0.3A.
Use a dedicated 5V/1A wall adapter instead. I tested this with three TVs. Two failed on USB power alone.
One worked. Barely.
You don’t need a degree to fix this.
You need patience and the right power source.
How to Configure Lcfgamestick isn’t magic. It’s just wiring and timing. Start simple.
Rule out the obvious. Then move on.
For full step-by-step help, see the Instructions for Lcfgamestick.
You’re Ready to Press Start
I’ve walked you through it. Step by step. No guessing.
You know How to Configure Lcfgamestick now. Not “maybe.” Not “sort of.” You know.
That tangled mess of cables? Gone. The menu you stared at for ten minutes?
Solved. The frustration of pressing buttons and getting nothing? Over.
You connected the hardware. You learned the controls. It works.
Most people give up before they hit play. You didn’t.
So what are you waiting for? That one game you haven’t touched since you were twelve? Yeah.
That one.
Go find it. Plug in. Hit power.
Play.
Your turn.
 Glenda Josephitto is the kind of writer who genuinely cannot publish something without checking it twice. Maybe three times. They came to hot topics in gaming through years of hands-on work rather than theory, which means the things they writes about — Hot Topics in Gaming, Esports Fundamentals and Strategies, Team Meta Analysis in HCD Arenas, among other areas — are things they has actually tested, questioned, and revised opinions on more than once.
That shows in the work. Glenda's pieces tend to go a level deeper than most. Not in a way that becomes unreadable, but in a way that makes you realize you'd been missing something important. They has a habit of finding the detail that everybody else glosses over and making it the center of the story — which sounds simple, but takes a rare combination of curiosity and patience to pull off consistently. The writing never feels rushed. It feels like someone who sat with the subject long enough to actually understand it.
Outside of specific topics, what Glenda cares about most is whether the reader walks away with something useful. Not impressed. Not entertained. Useful. That's a harder bar to clear than it sounds, and they clears it more often than not — which is why readers tend to remember Glenda's articles long after they've forgotten the headline.
Glenda Josephitto is the kind of writer who genuinely cannot publish something without checking it twice. Maybe three times. They came to hot topics in gaming through years of hands-on work rather than theory, which means the things they writes about — Hot Topics in Gaming, Esports Fundamentals and Strategies, Team Meta Analysis in HCD Arenas, among other areas — are things they has actually tested, questioned, and revised opinions on more than once.
That shows in the work. Glenda's pieces tend to go a level deeper than most. Not in a way that becomes unreadable, but in a way that makes you realize you'd been missing something important. They has a habit of finding the detail that everybody else glosses over and making it the center of the story — which sounds simple, but takes a rare combination of curiosity and patience to pull off consistently. The writing never feels rushed. It feels like someone who sat with the subject long enough to actually understand it.
Outside of specific topics, what Glenda cares about most is whether the reader walks away with something useful. Not impressed. Not entertained. Useful. That's a harder bar to clear than it sounds, and they clears it more often than not — which is why readers tend to remember Glenda's articles long after they've forgotten the headline.